Whether you’re freshening up a room or giving your entire home a makeover, painting is one of the most effective and affordable ways to transform a space. However, before you break out the brushes and rollers, there are some key decisions to make.
One of the most common questions DIY painters face is: Should you paint the ceiling or walls first? Along with that comes another set of queries, like how many layers of paint are needed and whether you can use the same paint for both walls and ceilings.
In this article, we’ll guide you through these decisions, helping you understand the best techniques and practices for achieving a flawless finish. Whether you’re painting a single room or tackling an entire house, knowing the right steps will make your project easier and more rewarding.
1. Should You Paint the Ceiling or Walls First?

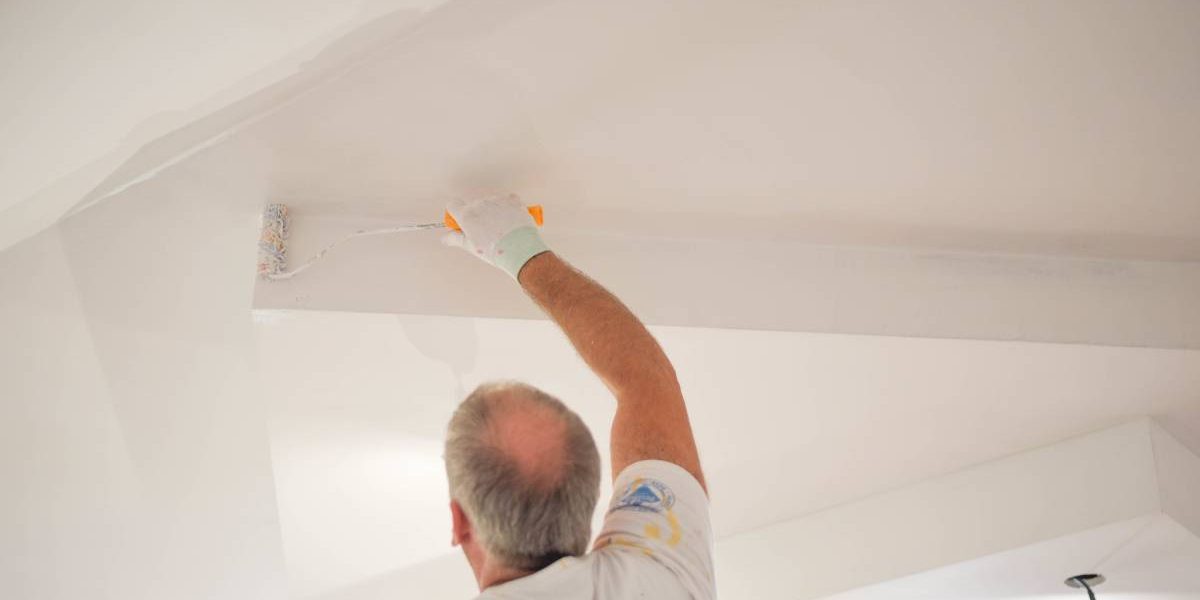
Always start with the ceiling. Professional painters agree that beginning with the ceiling is the smartest way to go. Why? Gravity.
When painting, drips and splatters are nearly unavoidable. If you start by painting the walls and then move on to the ceiling, there’s a good chance that ceiling paint will drip down and ruin your freshly painted walls. Starting with the ceiling avoids this mess and allows you to work more efficiently.
Steps to follow:
- Prep the room by covering furniture and flooring with drop cloths. Use painter’s tape to protect edges and moldings.
- Clean your walls and ceiling with a damp cloth or sponge to remove dust, dirt, and grease. This helps the paint adhere better and results in a smoother finish.
- Paint the ceiling first. Use a roller with an extension pole to make this easier on your arms and neck. Start at a corner and work in small sections.
- Once the ceiling is fully dry (at least 4–6 hours or overnight for best results), move on to the walls.
- Paint trim, doors, and baseboards last for the cleanest finish.
By following this order, you reduce the chances of having to redo sections and maintain crisp, professional edges between surfaces.
2. How Many Layers of Paint Can You Paint Over?

Another common concern for DIY painters is whether there’s a limit to how many coats of paint you can apply. While it’s tempting to keep layering on color or touch-ups, there is a point where too much paint can be a problem.
General Rule: 2-3 Coats
In most cases, 2 coats of paint are ideal:
- The first coat provides a solid base layer.
- The second coat gives you even color and better durability.
However, 3 coats may be necessary if:
- You’re painting a lighter color over a darker one.
- The surface is porous or textured.
- You’re using cheaper or thinner paint.
When Too Many Layers Become a Problem
You can technically apply multiple coats over time, but there are drawbacks:
- Paint buildup can cause uneven texture or ridges, especially near corners and edges.
- Cracking or peeling may occur if the layers underneath weren’t properly prepped or if the paint becomes too thick.
- In extreme cases, excessive layering might cause the topcoat to dry improperly, leading to a sticky or tacky finish.
How to Avoid Overpainting
- Prime when needed: If you’re making a major color change, use a primer. It helps the new color adhere better and reduces the need for additional coats.
- Use quality paint: Higher-quality paints often provide better coverage in fewer coats.
- Test first: Do a small patch before committing to another coat. If the color looks even and fully covered, you may not need more.
3. Can You Paint Walls and Ceiling With the Same Paint?

Technically, yes you can use the same paint on both walls and ceilings. But whether you should depends on the type of paint and the finish you’re using.
Differences Between Wall and Ceiling Paint
- Ceiling paint is usually flat or matte and has a thicker consistency. It’s formulated to drip less and hide imperfections under overhead light.
- Wall paint comes in various finishes eggshell, satin, semi-gloss, etc and is designed to be washable and durable for daily wear.
Using wall paint on a ceiling can result in:
- More noticeable flaws or roller marks.
- Increased glare from light fixtures.
- Drips or uneven texture due to thinner consistency.
When to Use the Same Paint for Both
You might opt for the same paint if:
- You want a uniform look in a small space (like a bathroom or minimalist modern room).
- You’re using a flat or matte finish for both surfaces.
- You’re painting a monochromatic design, like all-white or deep, moody tones.
Just make sure the paint is formulated for multi-surface use and will hold up to the specific needs of both walls and ceilings.
Best Practices
- Use flat white paint for ceilings in most traditional rooms—it’s timeless and hides imperfections well.
- Reserve glossier finishes for walls that get high traffic or need frequent cleaning.
- Always read the label to check if a paint is suitable for both ceilings and walls. Some brands sell “ceiling & wall” paint that works for both.
Additional Tips for a Successful Paint Job

1. Don’t Skip Prep Work
Clean the surfaces, repair cracks or holes, and sand rough patches before you start painting. Proper preparation ensures your paint adheres well and looks smooth.
2. Use Quality Tools
Good brushes and rollers make a huge difference. Cheap tools can leave streaks, bristles, or an uneven finish.
3. Mind Drying Times
Let each coat dry completely before adding the next. Rushing through the job can lead to peeling or uneven color.
4. Cut in First
Before using a roller, “cut in” by using a brush to paint around edges, corners, and trim. This ensures full coverage and neater lines.
5. Use Primer When Needed
Primer is especially helpful if:
- You’re painting over a bold color.
- The wall has stains or water damage.
- You’re covering new drywall or bare wood.
Final Thoughts
Painting your home is more than just slapping color on a wall it’s about process, technique, and smart choices. Start with the ceiling to avoid messy drips on freshly painted walls. Stick to 2-3 coats for ideal coverage, and only layer more if absolutely necessary.
While using the same paint for walls and ceilings is possible, it works best with flat finishes or purpose-made formulas.
Choosing the right type of paint and ensuring proper surface preparation will also help achieve a smoother, longer-lasting finish.
With the right prep and planning, you can achieve a fresh, polished look that lasts, saving you time and effort while enjoying the transformation of your space.