Installing turf yourself can be a rewarding project that transforms your outdoor space into a lush, green haven. But before you dive into laying down rolls of grass, there are several important things you should know to ensure your turf installation is successful and lasts for years to come.
Let’s break it down step by step so you can confidently tackle your turf installation project.
Tools and Materials You’ll Need
Before you start, gather all the necessary tools and materials to make the process smoother:
- Garden gloves: Protect your hands while working with soil and turf.
- Shovel and rake: For levelling soil and removing debris.
- Wheelbarrow: To transport soil, compost, or turf rolls.
- Lawn roller: Helps press the turf into the soil and eliminate air pockets.
- Sharp utility knife or turf cutter: For trimming turf pieces to fit your space.
- Measuring tape and stakes: To mark out the area and measure accurately.
- Garden hose or sprinkler system: For watering during and after installation.
- Soil test kit: To check and adjust soil pH if necessary.
- Turf underlay soil or compost: To create a nutrient-rich base for your new lawn.
- Fertiliser and lawn starter: Boosts root growth and helps the turf establish.
Having these tools ready will save you time and help you avoid frustrating interruptions during the installation process.
8 Steps of Installing Turf Yourself
1. Choose the Right Turf for Your Space
The first step is selecting the right type of turf for your environment and lifestyle. Natural turf comes in various grass types, each with different characteristics:
- Buffalo Grass: Drought-resistant and hardy, great for Australian climates.
- Kikuyu Grass: Fast-growing and robust, ideal for high-traffic areas.
- Zoysia Grass: Low-maintenance and slow-growing, suitable for decorative lawns.
- Sir Walter DNA Certified Turf: Popular for its softness and resilience.
- Bermuda Grass: Tolerates heat and heavy foot traffic, perfect for sports fields.
- Fescue Grass: Cool-season grass that stays green in winter but may need more water.
If you prefer minimal upkeep, synthetic turf might be an option. It doesn’t require mowing or watering, though it can get hot in direct sunlight.
2. Measure and Plan Your Area
Accurate measurements are crucial to avoid buying too much or too little turf. Sketch out your lawn area and break it into manageable sections to calculate the total square meterage. It’s a good idea to order a bit extra to allow for cutting and shaping.
Also, consider the shape and layout of your garden — curved edges or intricate areas may require more turf and careful trimming.
3. Prepare the Soil Properly
Good preparation is key to a healthy lawn. Start by clearing the area of weeds, rocks, and debris. You might need to use a herbicide to kill persistent weeds, but make sure to wait the recommended period before laying turf.
Level the ground and fill in any holes. Then, turn the soil over to a depth of about 10–15 cm to loosen it up and improve drainage. Remove large clumps and break up compacted soil to give the grass roots room to spread.
Next, add quality turf underlay soil. This provides a nutrient-rich base for the roots to establish. Level the soil using a rake, and compact it slightly with a roller or by walking over it. Test the soil pH — ideally, it should be between 6 and 7. You can amend the soil with lime or sulfur to adjust the pH if necessary.
4. Check Drainage and Irrigation
Proper drainage prevents your lawn from becoming waterlogged and developing root rot. If your area tends to hold water, you might need to install a drainage system or build a slight slope to guide water away from the lawn.
Plan your irrigation, too. Installing a sprinkler system or soaker hoses before laying turf makes watering easier and ensures even coverage. Think about placing irrigation lines around trees or garden beds to avoid future complications.
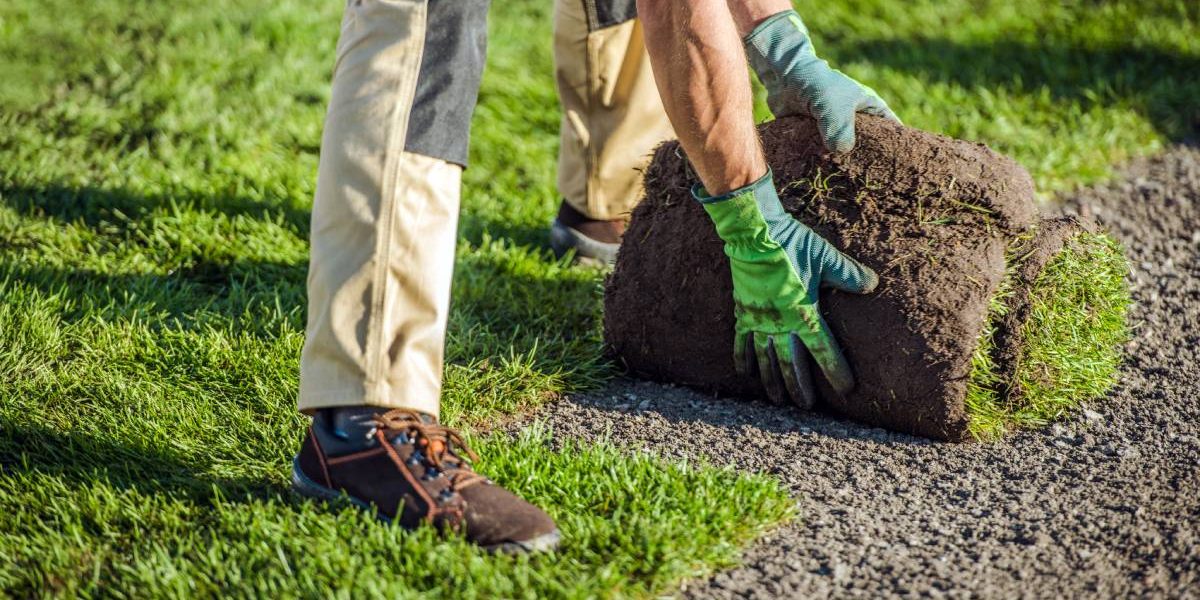
5. Lay the Turf Correctly
When your turf arrives, install it as soon as possible to prevent it from drying out. Start by laying the first row along a straight edge, like a driveway or path. Stagger the joints in a brick-like pattern to avoid visible seams.
Press each roll down firmly and butt the edges closely together to prevent gaps. Use a sharp knife to trim around edges and obstacles. For slopes, lay the turf perpendicular to the slope and use stakes to hold the pieces in place while they establish.
6. Roll and Water Your New Lawn
Once the turf is laid, roll over it with a lawn roller to press the roots into the soil and eliminate air pockets. This helps the turf establish better and reduces the risk of uneven patches.
Water the lawn deeply immediately after installation. For the first few weeks, water daily (or even twice a day in hot weather) to keep the turf moist while the roots take hold. Early morning and late evening watering reduces water loss through evaporation.
7. Know the Aftercare Routine
The work isn’t over once the turf is down! Your new lawn will need ongoing care:
- Watering: Reduce watering gradually as the roots establish. A well-established lawn typically needs about 2.5 cm of water per week.
- Mowing: Wait until the grass is about 5–7 cm tall before the first mow, and only take off a third of the height. Use sharp mower blades to avoid tearing the grass.
- Fertilising: Feed your lawn with a suitable fertiliser to promote growth and prevent weeds. Use a slow-release fertiliser every 6–8 weeks during the growing season.
- Weed Control: Keep an eye out for weeds and remove them early. Hand-pulling works well for small areas, but larger lawns might benefit from selective herbicides.
- Aeration and Dethatching: Over time, your lawn may develop compacted soil or thatch buildup. Aerate the soil annually and dethatch if the layer exceeds 1 cm.
8. Be Aware of Common Pitfalls
Many DIY installers run into a few common issues, such as:
- Uneven Ground: Can cause pooling water and an uneven lawn.
- Poor Soil Quality: Leads to weak, patchy grass.
- Insufficient Watering: Causes the turf to dry out and die.
- Not Allowing Time to Establish: Avoid heavy foot traffic until the turf is firmly rooted.
- Ignoring Sunlight Requirements: Some grass types need full sun, while others tolerate shade. Planting the wrong type can cause bald patches.
Final Thoughts
Installing turf yourself can be a significant project, but with the right knowledge and preparation, it is entirely achievable. To start, it’s important to select the appropriate type of grass that suits your climate and usage needs. Consider factors such as sunlight, foot traffic, and maintenance requirements when making your choice. Next, you’ll need to adequately prepare your soil by removing any existing weeds, levelling the area, and enriching the soil with the necessary nutrients. This foundational step is crucial for promoting healthy grass growth.
Once you have your soil ready, consider sourcing high-quality turf from a trusted supplier like A View Turf, a leading turf supplier in New South Wales. They offer a variety of grass types that can fit your specific requirements, ensuring you get the best possible product for your lawn.
Finally, committing to proper aftercare—such as regular watering, mowing, and fertilization—will help you achieve a lush, green lawn that significantly enhances your home’s outdoor space. With the right approach, you can create a beautiful landscape that you will enjoy for years to come.